Basics of Troubleshooting VoIP (Tools)
An issue I was working through recently reminded me about some of the tools of the trade that we sometimes take for granted. I’ll continually update this post, so check back every now and again.
I’ve written extensively about Wireshark, so I am not going to cover it again here, but it is probably one of the most powerful tools at your disposal. If you are looking to learn more about Wireshark, Laura Chappell has an outstanding book that I hand to Marines when they have no experience. It is an incredible resource.
A recent troubleshooting experience reminded me about some of the personal tools we may have available. In this scenario, we controlled the voice gateway router and the CallManager, but we did not control the TDM gear. The switchboard operator was not available to speak with us for a couple of hours, so we were basically in the check/double-check/triple-check cycle. After going through all of the CallManager configs, resetting everything, and eventually just deleting and re-configuring, we moved on and did the same on the voice gateway router. I was 95% convinced it was a layer 1 (physical cabling) issue, but given we had a couple of hours before the switchboard operator was available, I did not want to assume. The router was reporting the D-channel (Serial 3/0:23) as down/down, and my CallManager was showing the gateway as “unregistered”. What I SHOULD have done was place a loopback plug on the T-1 port on the voice gateway router. If the D-channel came up and the voice gateway registered, we could have confirmed that layer 1 was definitely the problem. Admittedly, I forgot about using loopbacks until hours later.
So where can you get a T-1 loopback plug? You could buy a pretty one, like this one or any of these. If you are pressed for time or for money, you can very easily make one. If you are using a Cisco T-1 (MFT T1/E1), it should look something like this:
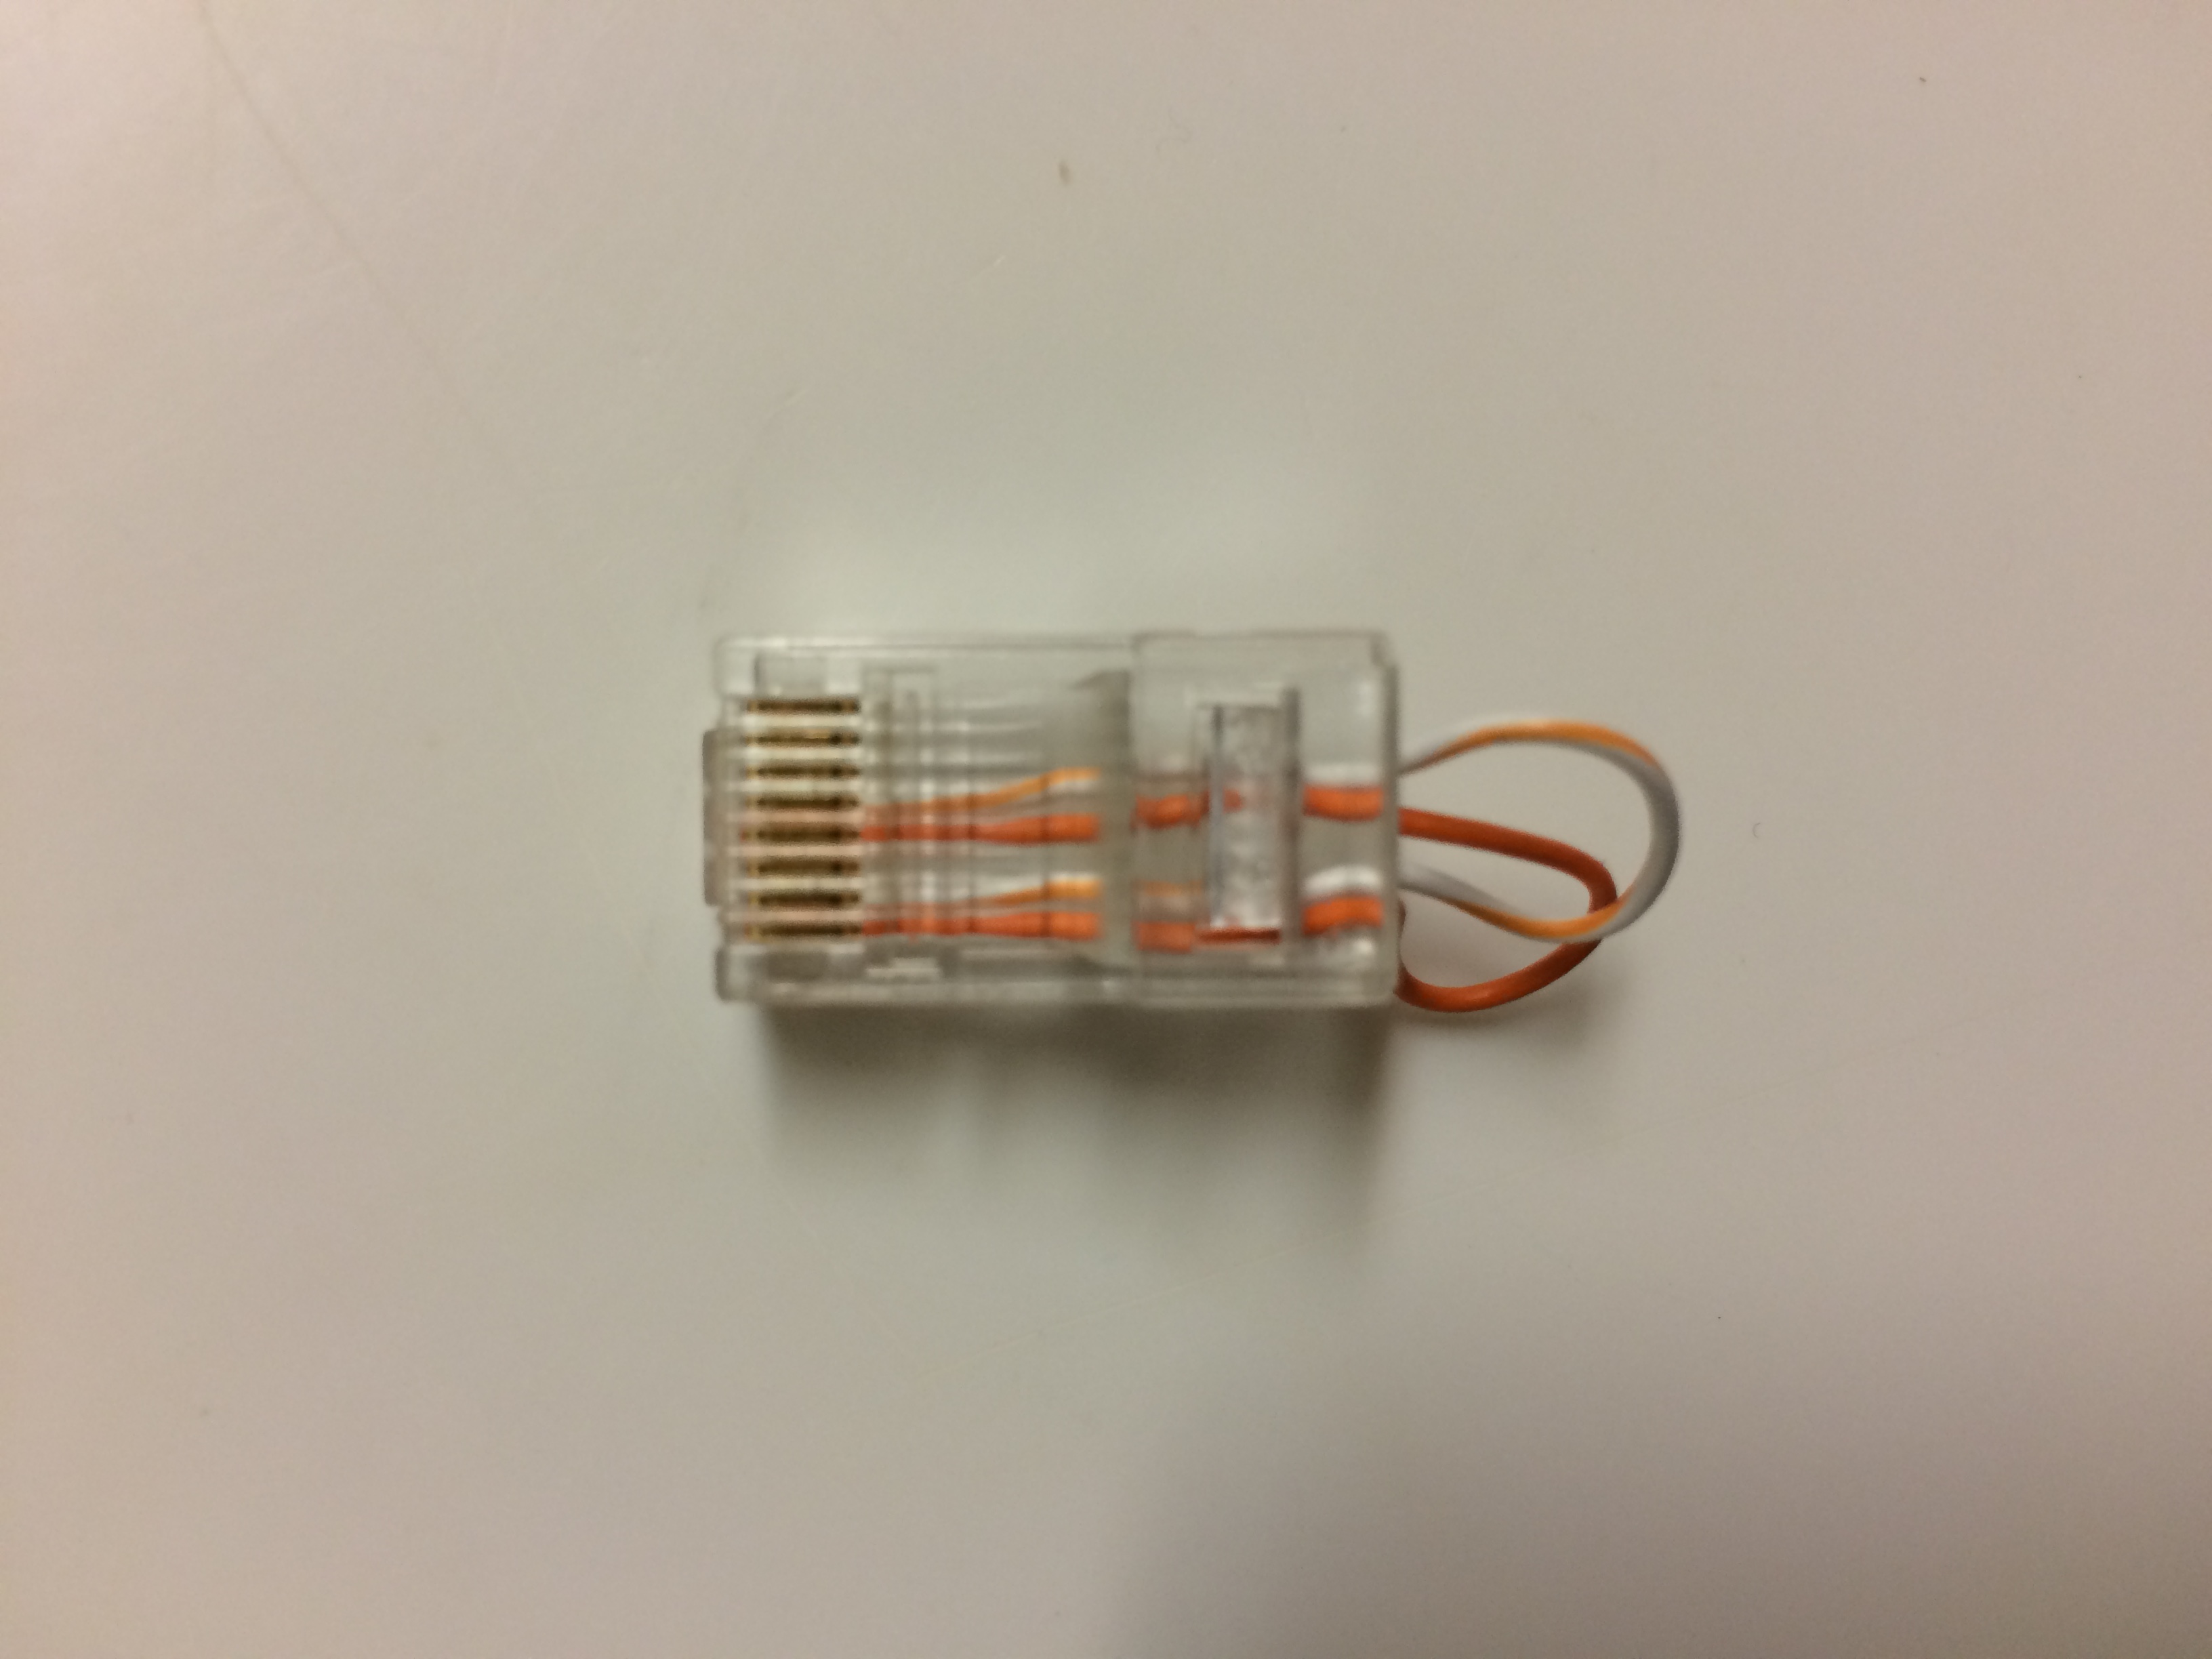
All you need to do is grab a RJ-45 connector and flip it to where the clip is on the table. The RJ-45 connector above has pins 1-8, with pin 1 at the bottom of the picture, and pin 8 at the top. Strip back a length of CAT5e cable and grab one of the color pairs. You can see I grabbed the orange pair. The cisco voice router cards use the following standard:
Pin 1: Receive Tip
Pin 2: Receive Ring
Pin 4: Transmit Tip
Pin 5: Transmit Ring
To create a loopback, you simply connect the same cable from the Receive Tip to the Transmit Tip (pin 1 -> pin 4), and the second cable from the Receive Ring to the Transmit Ring (pin 2 -> pin 5).
I plan on adding to this when I get some time, but meanwhile, @amyengineer appeared in an article covering her favorite tools and it is pretty good. Check it out here.