Jumbo Size Me
I’ve been very slowly working on putting together my “Datacenter” strategy and a topic of curiosity that continues to come up is the use of jumbo frames. A jumbo frame is a frame where the MTU has been adjusted to larger than the standard size. Depending on how you look at it, the term jumbo frame can be misleading because on a Cisco device, we actually adjust the IP MTU (the Layer 3 and above information, ie. not Layer 2). The standard MTU of 1500 for a packet will either be 1518 for an untagged frame, or 1522 for a frame with a 802.1Q shim. By pushing the size of the packet from 1500 to 9000, you achieve more efficiency by using a reduced percentage of your total throughput for header information. This will also consume fewer CPU resources for your computer and for the routers/switches (fewer packets/frames to route/switch).
Before we can talk about the how, we should address the where. Can we just enable jumbo frames everywhere for everything? You could do this, but it would not be the best idea. Normally, if you send a packet to a router that is too big, the router will reply with an ICMP type 3 code 4 which will tell your device that you need to send a smaller packet. There are times where people misunderstand or overly configure security and drop ICMP packets altogether. Because of this possibility, and the likellihood that if someone has done this they won’t give you a heads up, we should rule out jumbo frames everywhere (there are several other reasons too, but let’s move on). So in the Datacenter, where would be appropriate places to enable this? My first thought is anywhere that does not need to hit a router. The two networks that come to mind here are your storage network (in the case of the Marine Corps, the network where you run either NFS or iSCSI) and your vMotion network. Given that vMotion is not currently allowed to cross beyond Layer 2 (is not supported for Layer 3), this network would be a great candidate. Also, because both of these networks are dealing with massive amounts of information, they would also be appropriate. If you had a network that mainly used small packets, such as your voice VLAN, jumbo frames would not help you at all.
To fully enable jumbo frames for your storage network, you will need to configure the switch to be able to process/forward larger than usual frames, the NIC on the server (ESXi) that contains your storage adapter to send/receive larger frames and the storage device (NetApp filer) to send/receive larger frames. On the vMotion network, you would just need to make sure the NIC/NICs that you are using for your vMotion traffic on each of your ESXi hosts are able to send/receive larger frames. A blend of some supporting jumbo frames and others not supporting jumbo frames would not be acceptable, your environment will need to be homogenous on this effort.
Here is what that would look like on your switch:
You can see above the command to enable jumbo frames on a 3750 switch. If you have a true Datacenter switch (like a Nexus) or one of the larger Cisco switches (6500) this will vary. On some models it is a per interface configuration, in this case it is a global command.
Notice that the switch lets us know that this change will not take effect until a reboot? What if you do not know if the switch has been rebooted or not? Let’s do some verification commands:
The above screenshot is what it would look like after you have added the command to enable jumbo frames, but before you have done the required reboot.
The above screenshot was taken after a reboot and what you should see after a successful configuration. Now let’s take a look at how to do this on the filer:
As illustrated by the above screenshot, enabling jumbo frames can be easily accomplished during the initial configuration of your filer. Simply change the default no to a yes and you are good to go.
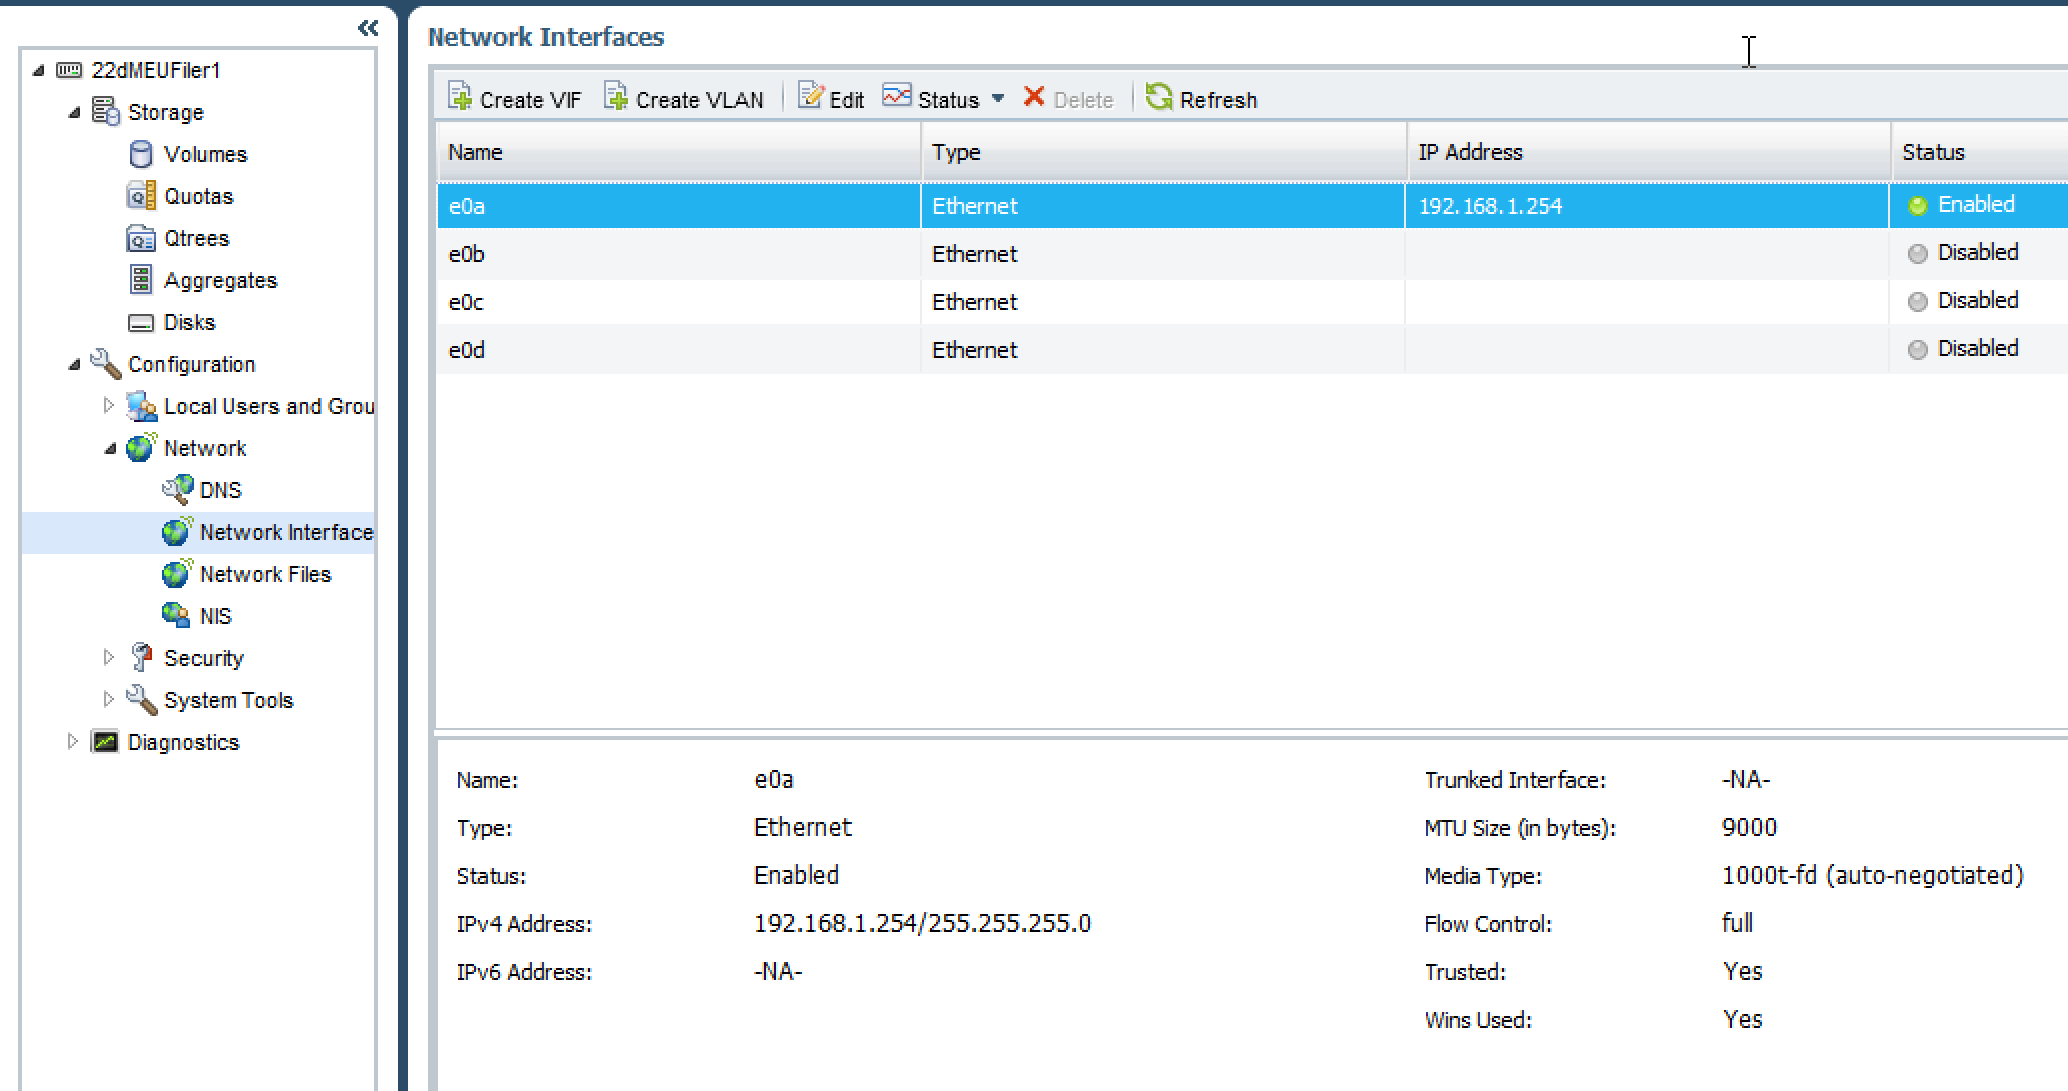
From the screenshot above we can see that enabling jumbo frames during the initial setup was successful as the “MTU Size (in Bytes)” reads 9000. The switch and the filer were pretty easy. Let’s head over to the ESXi host. I only did this on one of the hosts, but the process would be exactly the same but you would complete it twice.
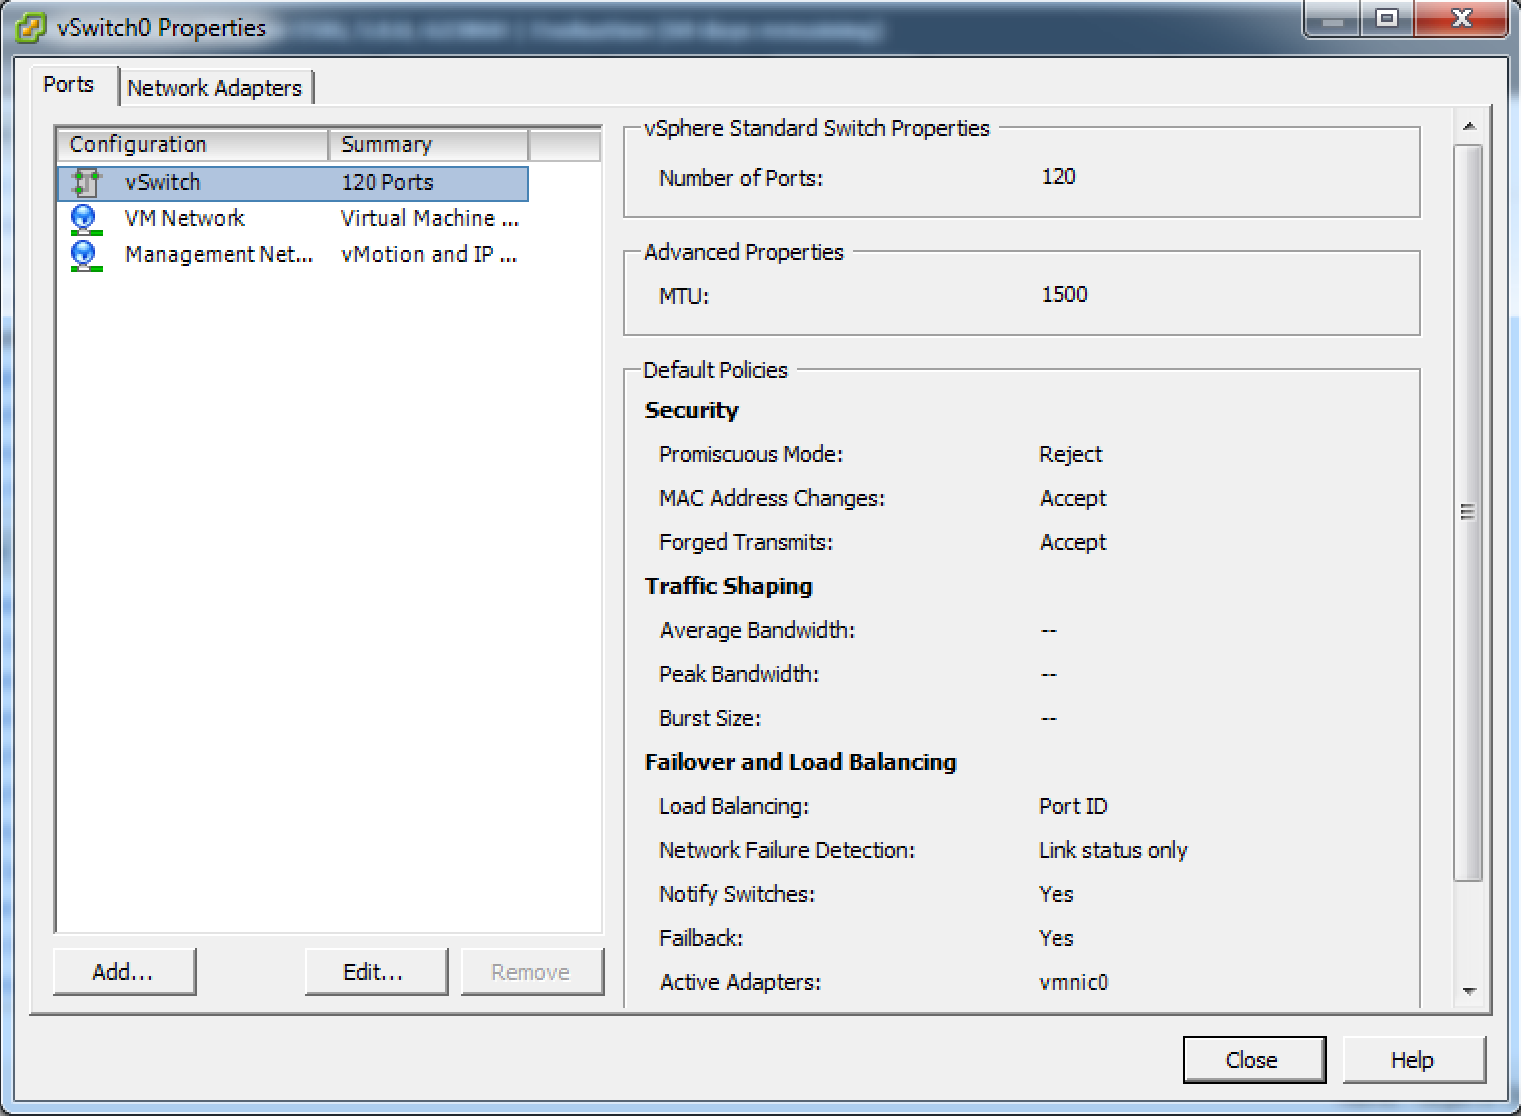
Click on the vSwitch to highlight it, and then click on the “edit” button below.
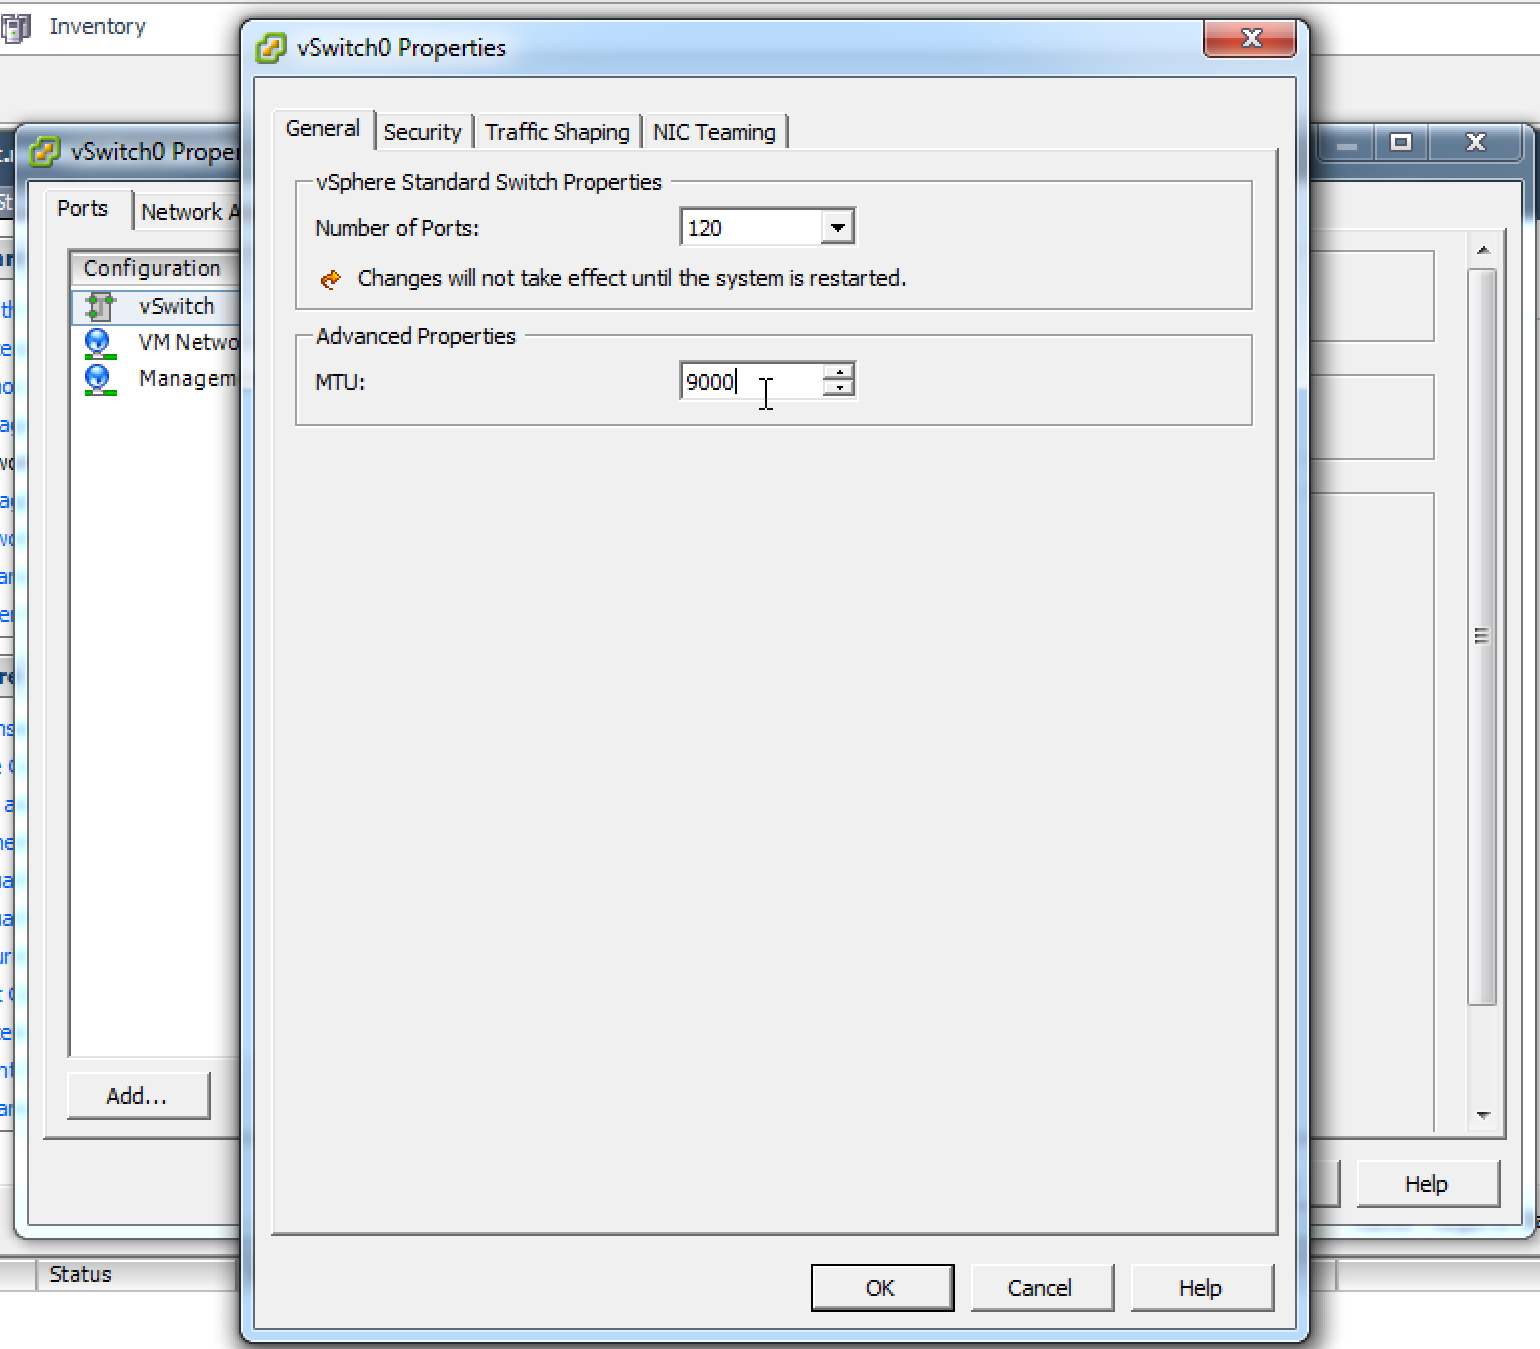
Under the “General” tab in the “Advanced Properties” box change the MTU from the standard 1500 (the default) to 9000.
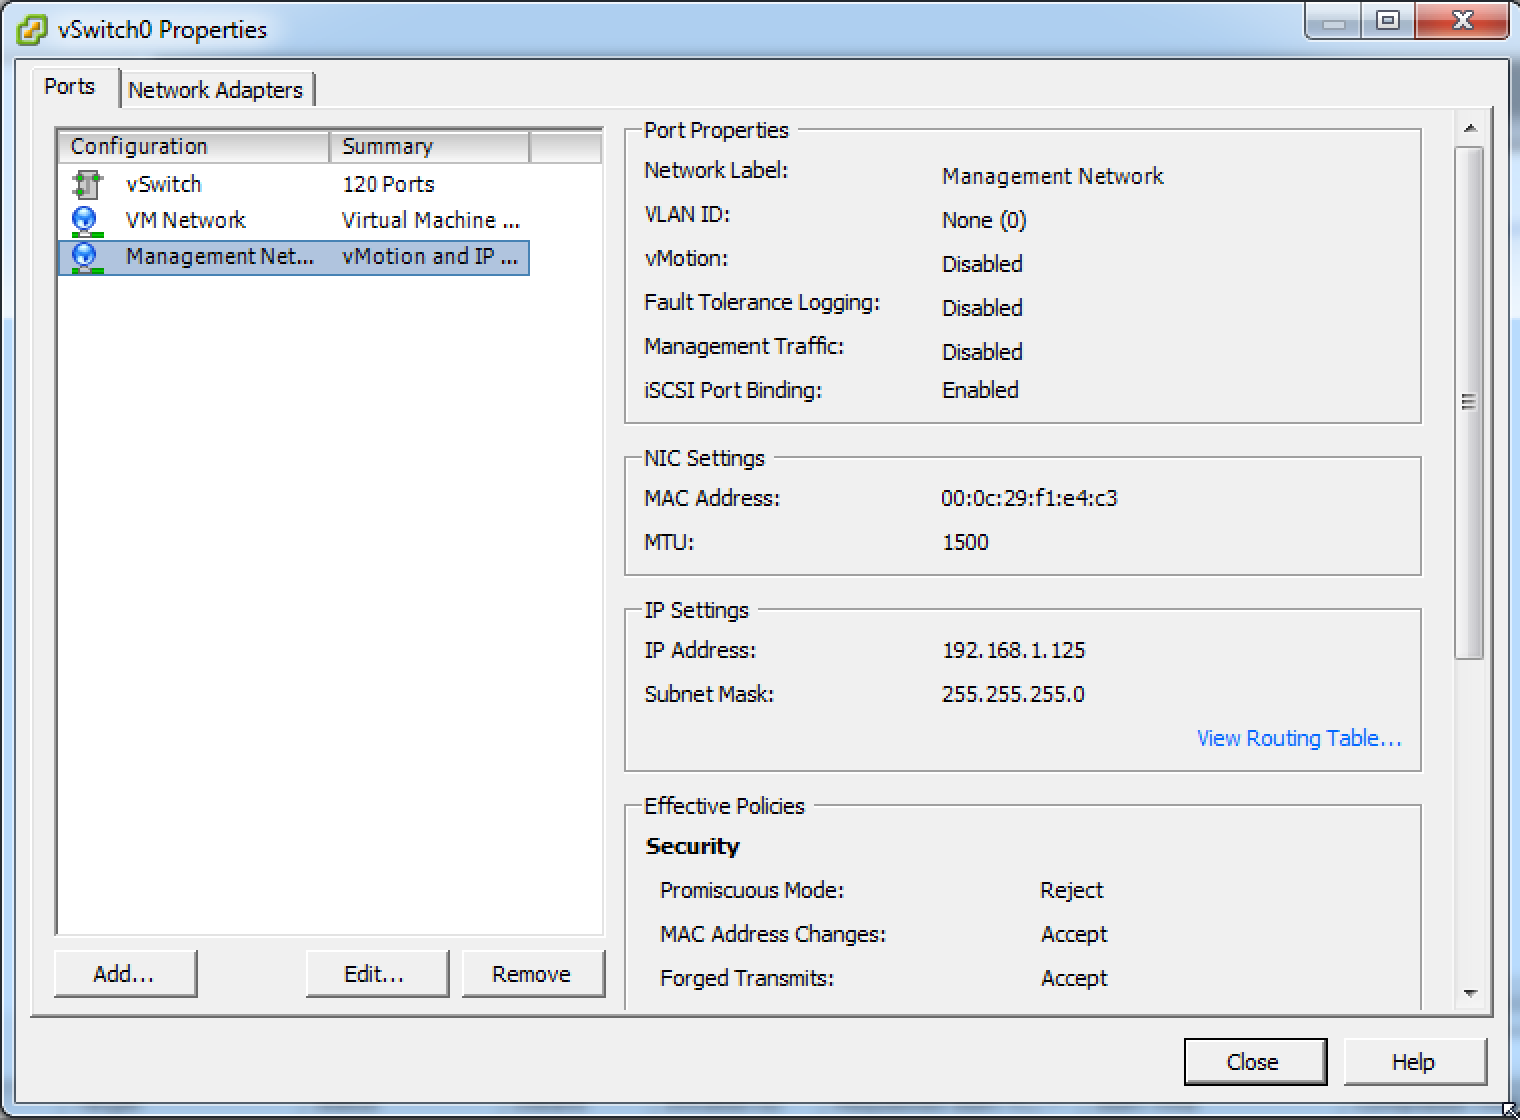
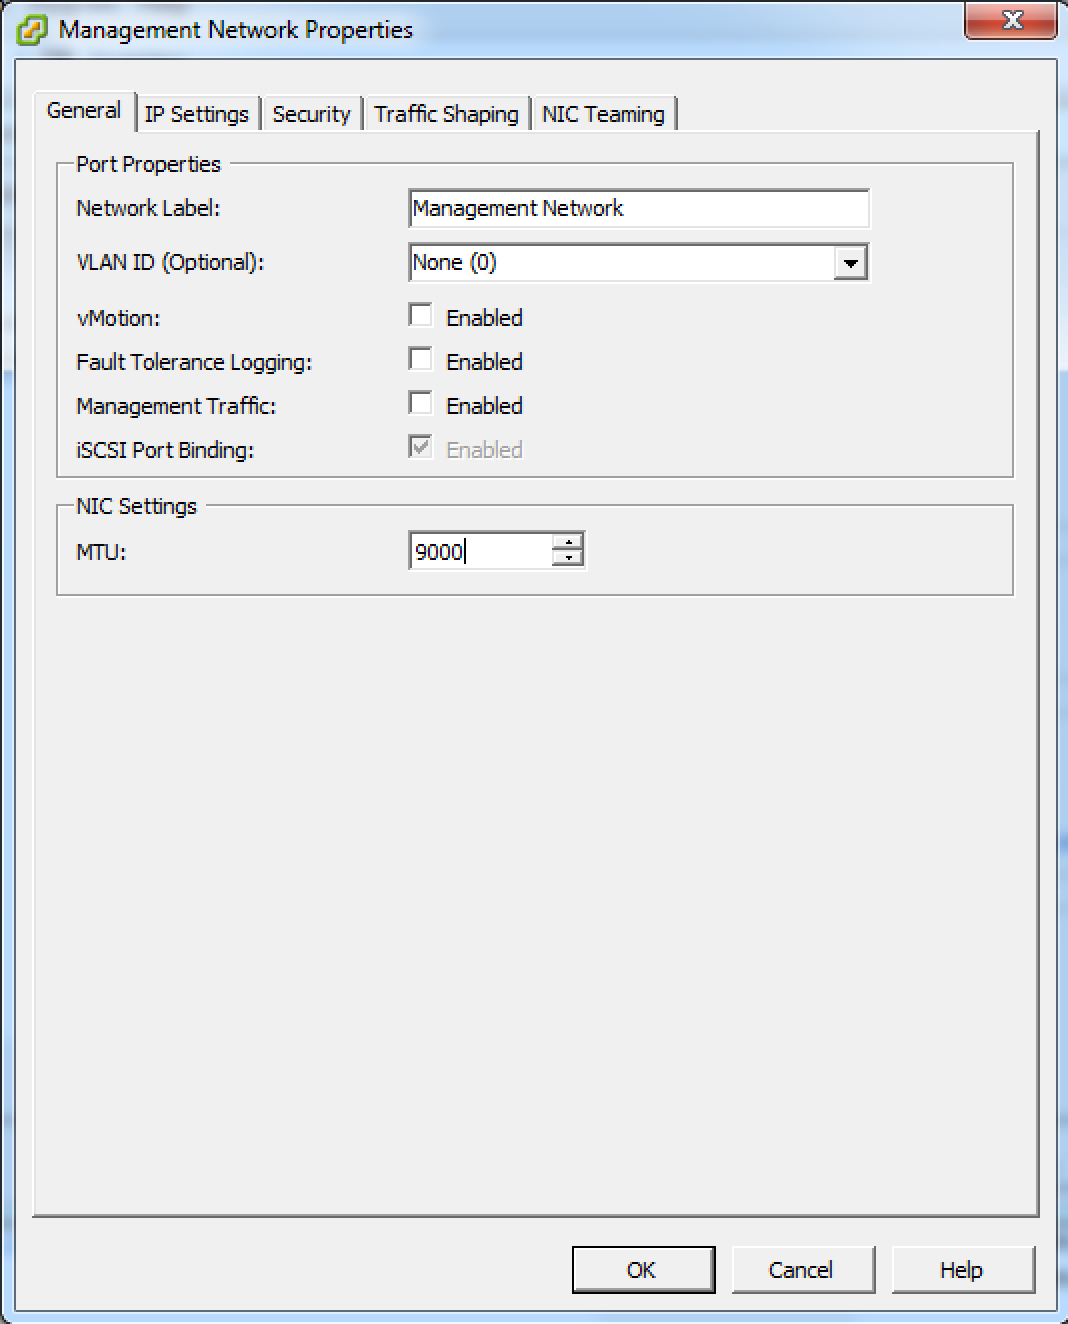
As pointed out in the comments, make sure you do not forget to change the MTU for the VM Kernel (if applicable). It really depends on how you set your networks up whether a VM Kernel will belong to your vSwitch (there will be a VM Kernel for vMotion and iSCSI, not necessary for just virtual machines). To start off, select your VM Kernel network (called “Management Network” above) and click Edit.
From there, change the NIC settings from the default of 1500 to 9000 for jumbo. Click ok to finalize your settings.
So that is it, enabling jumbo frames officially complete!


