Storage for VMware – Setting up iSCSI vs NFS (Part 1)
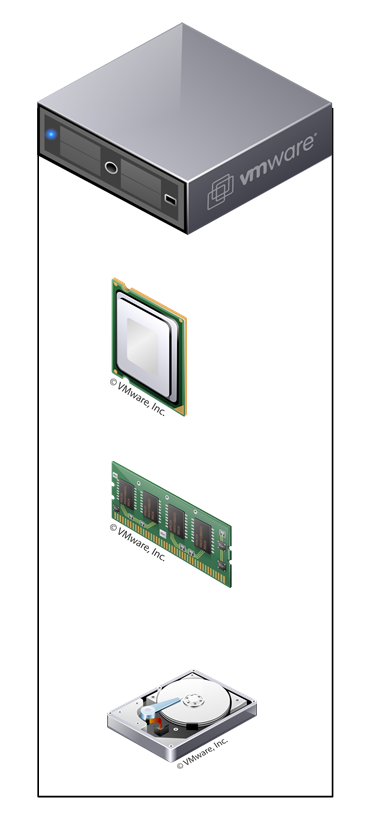
Nearly any conversation about VMware configuration will include a debate about whether you should use iSCSI or NFS for your storage protocol (none of the Marine Corps gear supports Fibre Channel so I’m not going to go into FCP). Instead of debating the merits of either protocol, I’m going to cover the basics of why we use them and take you through the configuration of both on VMware and NetApp. The first question is why do we go to the effort to setup external storage? You don’t HAVE to use external storage. You could just install your Virtual Machines (VMs) on local storage (the hard drives on your physical servers, ESXi hosts). Your resources (CPU, RAM, and storage) would look something like this:
Unless you are using version 5.1 or newer, you are required to have shared storage for vMotion. If you are not familiar with vMotion, it gives you the ability to live migrate your VMs from one ESXi host to another. Shared storage means you need to have the files that make up your VMs located on a device that your ESXi hosts have access to (in our environments, that is most likely a NetApp filer). Additionally, there is a lot more redundancy built into devices that are designed exclusively for storage (network interfaces, storage controllers, additional physical discs, etc.). There are also a lot of other benefits that could be more appropriately covered by an additional post. Using shared storage would look something like this:
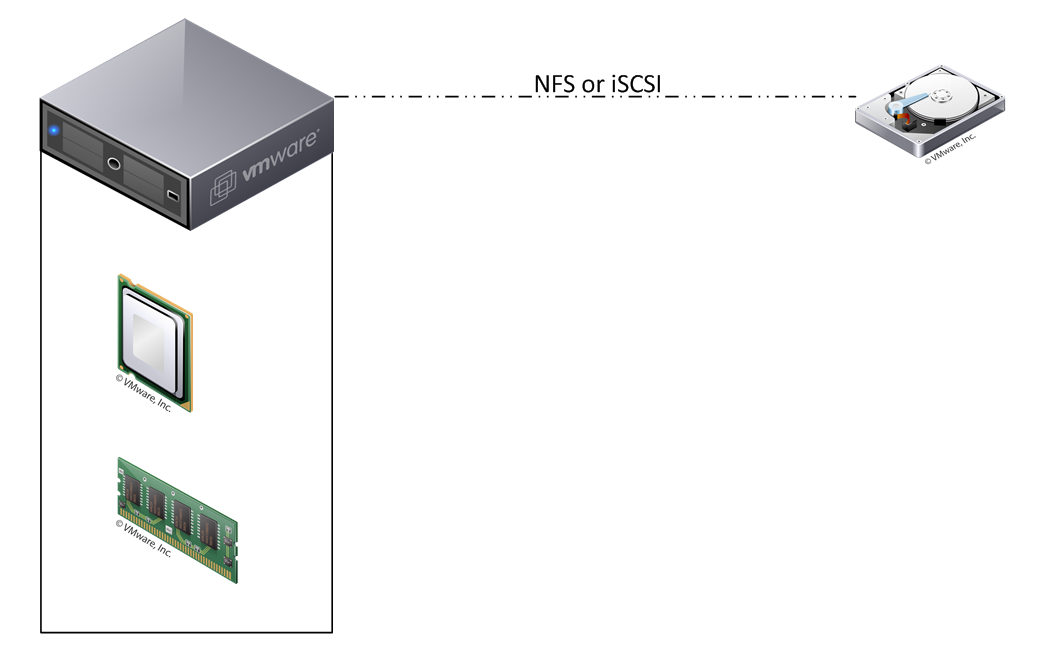
Now that we have covered what the shared storage would look like conceptually, we’ll go into the difference between NFS and iSCSI very briefly. NFS (Network File System) is a NAS (Network Attached Storage) protocol and iSCSI (Internet Small Computer System Interface) is a SAN (Storage Area Network) protocol.
In all of the research I have done it appears there is not a significant performance difference between the two protocols. NFS is slightly slower than iSCSI, but easier to configure. iSCSI is slightly faster than NFS and gives you access to some additional features (SnapManager for Exchange being the most notable for Marine Corps employments).
Let’s start things off by looking at NFS configuration:

Under the “Configuration” menu, select “System Tools”, then “Licenses”. Most likely you will not see NFS there is this is a fresh filer. If it is in use, the license may be there.
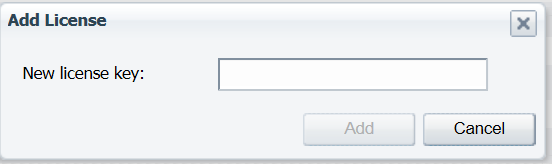
If it isn’t, click on “add license” and enter your license key in the box. The Program of Record (POR) Marine Corps systems with NetApp filers in them have NFS licenses already purchased, you will just need to enter it in.
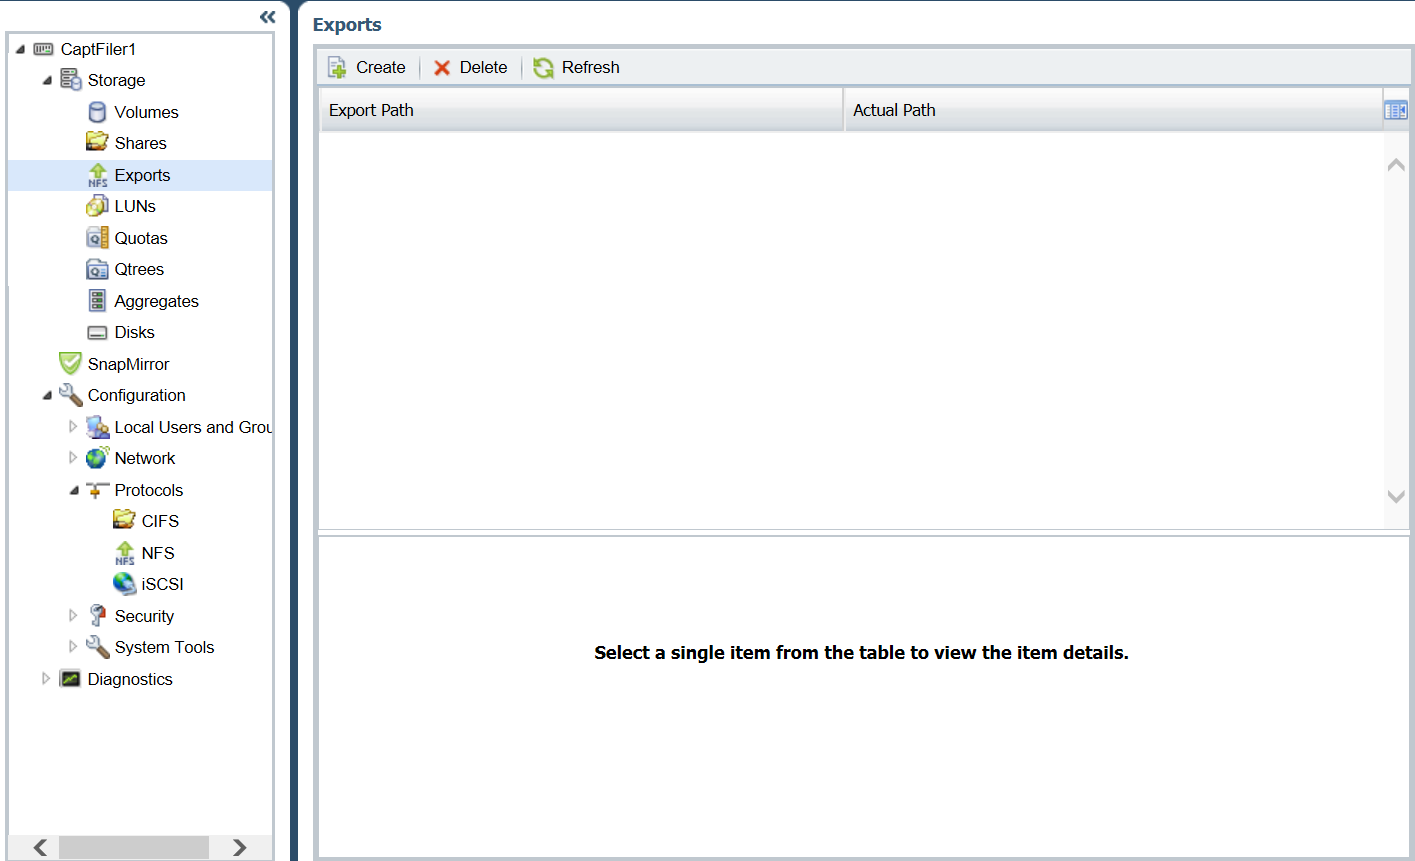
When you click on “NFS Exports” under storage, it will tell you show you the volumes that you are exporting. In the picture above, there are no volumes being exported.
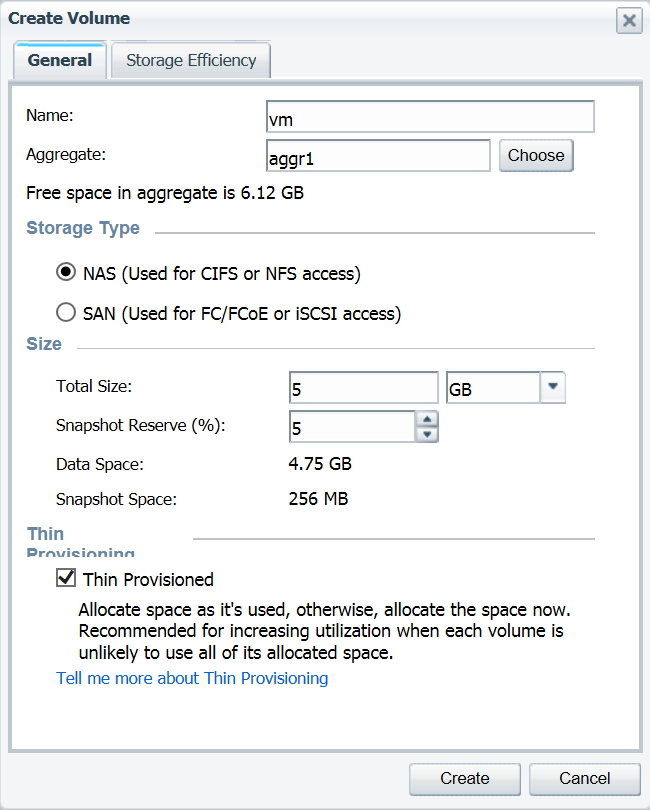
Whenever I create a new virtual infrastructure, I like to create a separate volume to put my VMs in. Under “Storage” select “Volumes” and then click the “Add New” button. Name the volume whatever you would like that distinguishes it from the others. Choose the appropriate aggregate to put the volume in. Under “Storage Type” choose “NAS”. Choose the size of volume you would like, and make sure you click the “Thin Provisioned” box. Then click the “Storage Efficiency” tab.
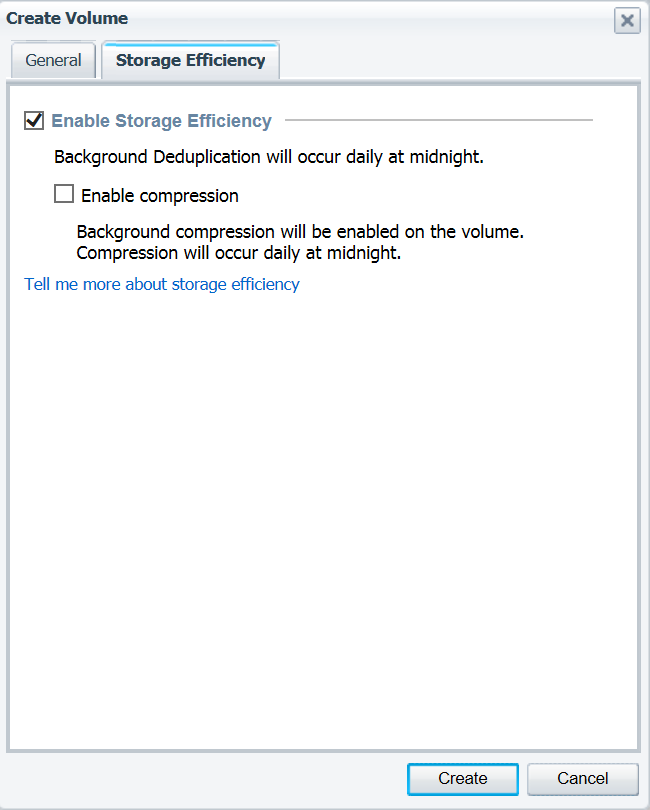
Click the “Enable Storage Efficiency” box. This turns on data deduplication. It is outside the scope of this post to go into deduplication, but it is a really cool feature and I would recommend you turn this on.
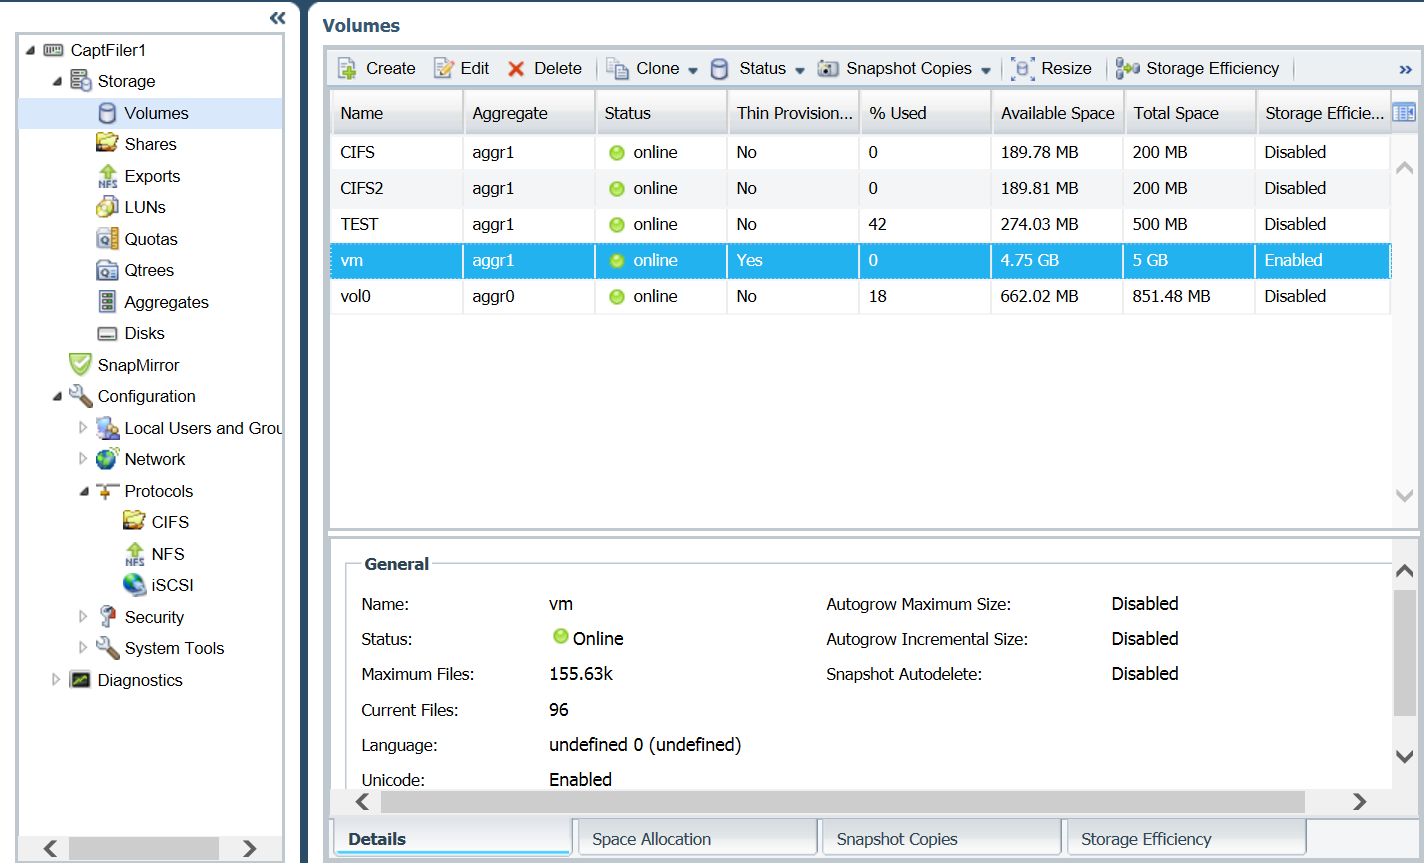
You can see from the graphic above that our new volume “vm” (highlighted) was created.
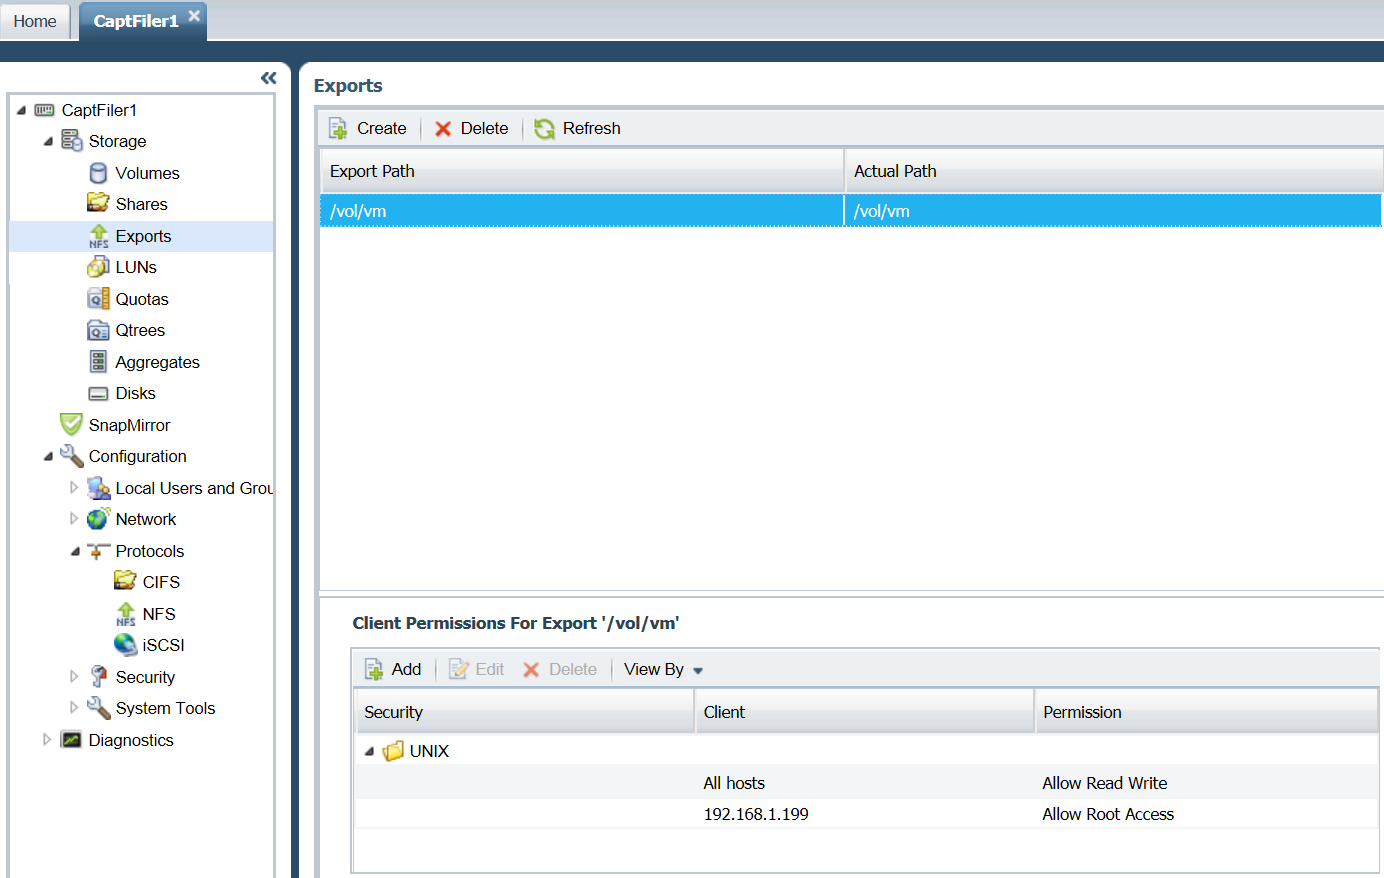
After the new volume has been created, we need to go back into the NFS Exports tab for one last task. From the graphic above you can see in the bottom right the “Client Permissions” box. Highlight “UNIX” and click the edit button.
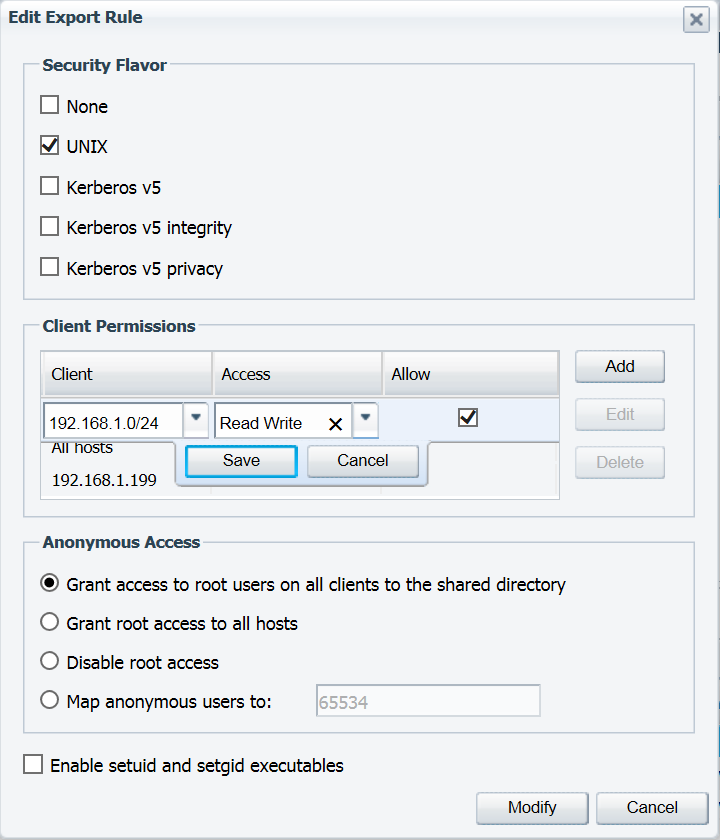
You can accomplish this task in several different ways. You need to provide “root” access to each of your ESXi hosts. You could do it individually if you wanted to by just typing the ip address in the “client” box, and “root” under access. I normally put my storage and ESXi hosts on their own subnet, so I just put the entire network in there. It would look something like the graphic above (192.168.1.0/24, just make sure you remember to select “root” for access as the picture does not depict that). That finishes up the NetApp side of the configuration for NFS. Now we are going to head over to the VMware ESXi configuration.
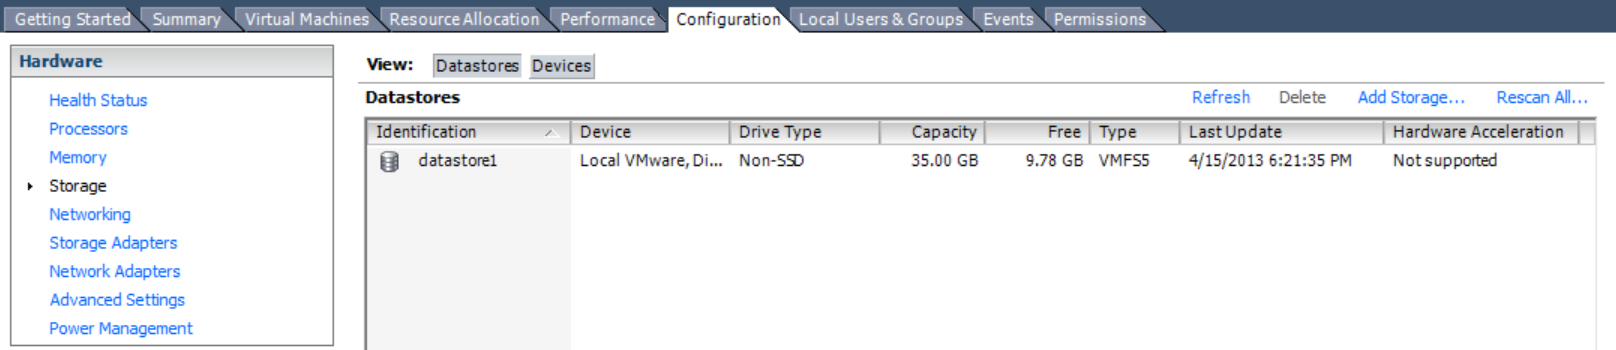
Click on your ESXi host. Then click the “Configuration” tab and click on “Storage” under the “Hardware” box. Click the “Add Storage” link.
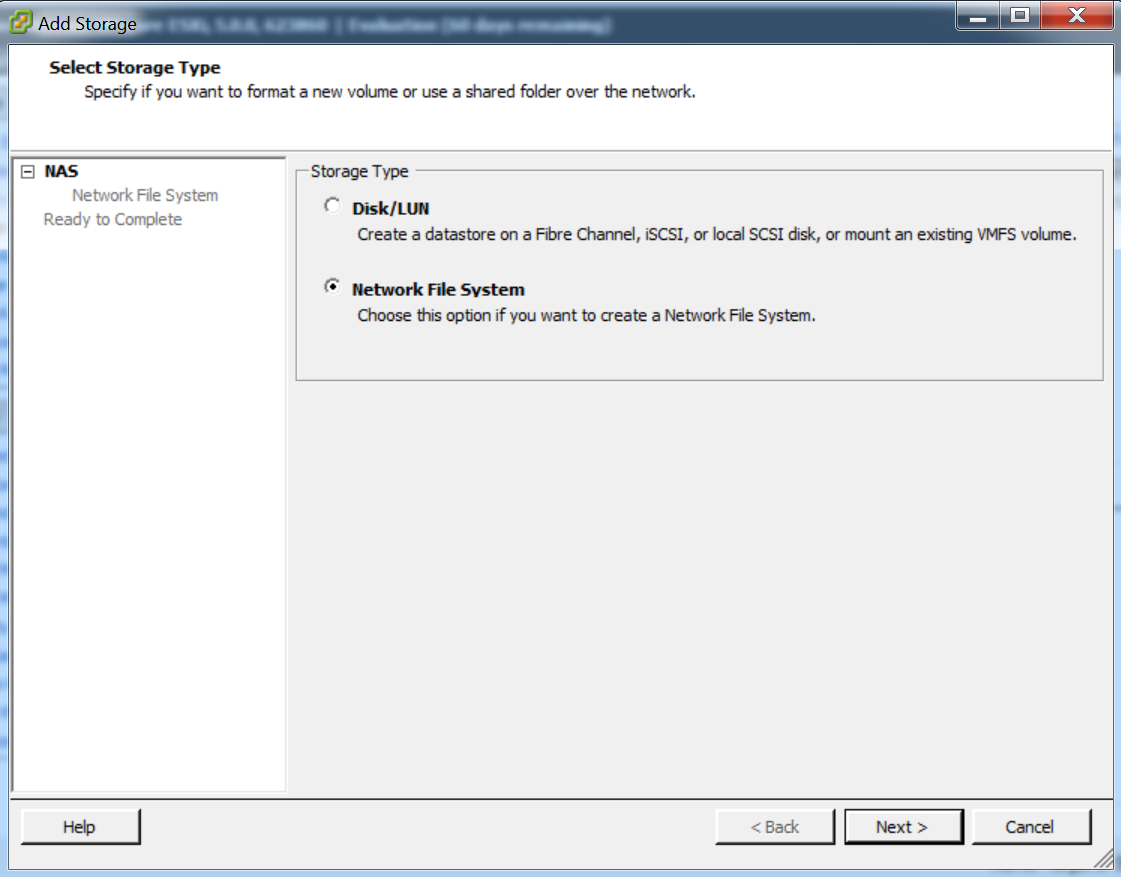
Under the storage type, select “Network File Service”. Click next.
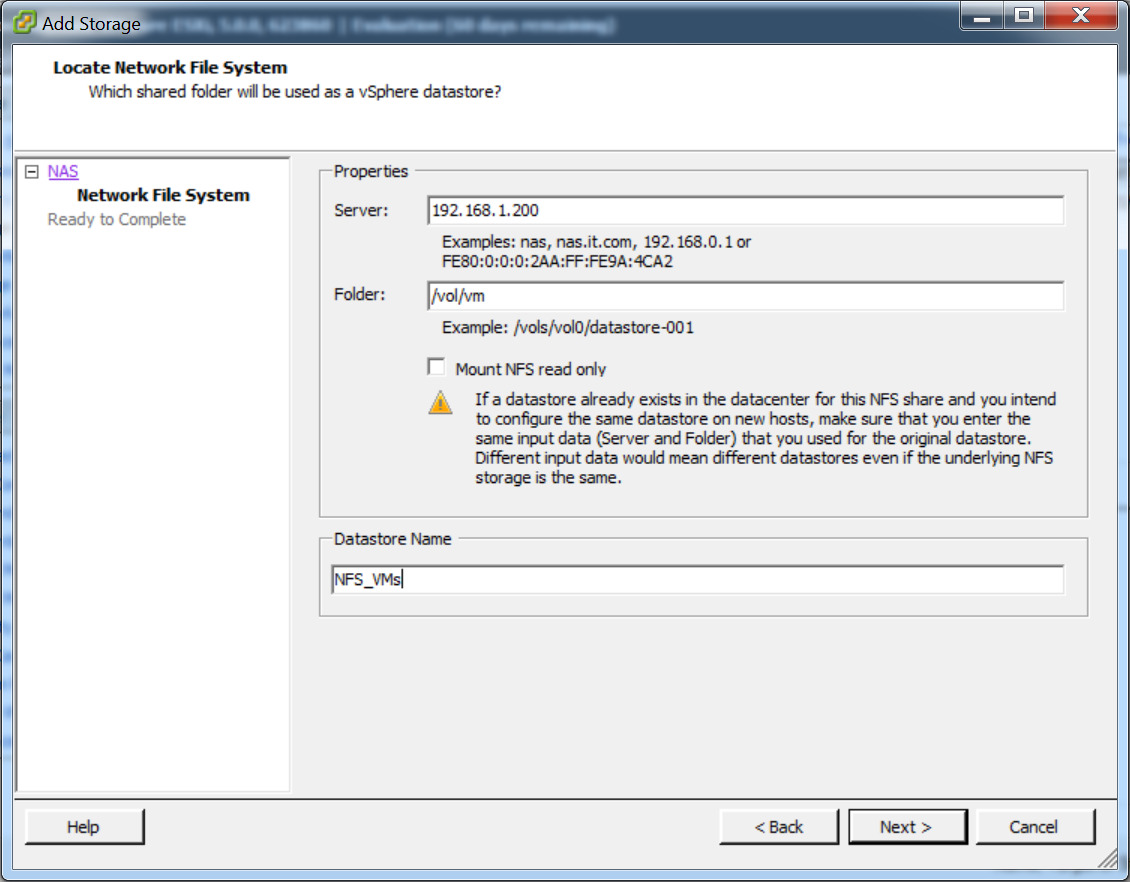
On your NFS screen there are a couple of things you need to pay attention to. The server IP corresponds to the IP address of your NetApp (which we just finished configuring). For the folder, at least with NetApp, the format is /vol/<name of your volume>. We previously created a volume called “vm” so your folder would be “/vol/vm”. Lastly, you need to fill out the “Datastore Name”. When you configure your NFS datastore, if you want vMotion to work, you need to make sure you use the same Datastore Name on all hosts. Even if you mount the same volume on every host, if the Datastore Name does not match, vMotion will not work. After that is complete, click “Next”.
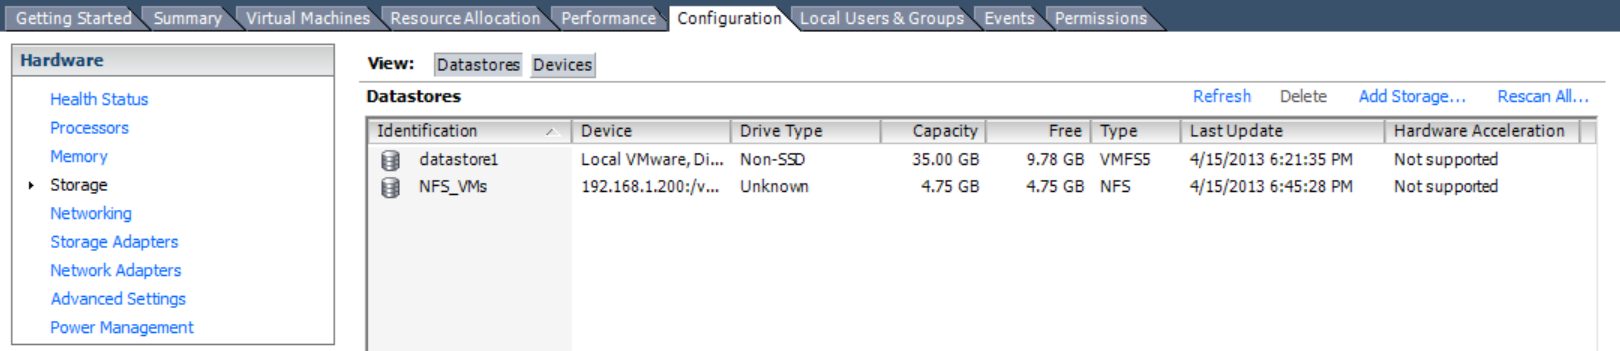
The graphic above is what it should look like when your NFS datastore creates. If it errors out, your two most likely reasons are either a lack of IP connectivity, or mistyping the path.
To recap, here are your steps to configuring an NFS datastore:
- On your NetApp, ensure NFS is licensed and the protocol is enabled.
- Create a volume to be used for NFS.
- Export that volume as an NFS export.
- Assign your ESXi host(s) and/or subnet root permissions.
- On your ESXi host(s), add your NFS datastore.
I’m going to break this up into a part 1 and part 2. We’ll cover iSCSI in part 2.